Summary
"Encouraging an interest in STEM through play"- Wearable guided play device for children
- Collaborative team project
- Arduino technology
- Textile integration
- High-fidelity prototype
Activities:
- UX design
- UX research
- Interaction design
- Prototyping
- Physical computing
- Visual design
- Team collaboration
My role:
- Team user experience design
- Team user experience research
- Team interaction design
- Sole visual design
- Sole garment construction
- Team electronics installation
What I learned:
- How to conduct UX research
- How to conduct UX design
- How to see a project through from ideation to high-fidelity prototyping
- Arduino coding basics
- Electronics basics
- Experimental wearable textiles (i.e. conductive fabric and thread, piezoresistive fabric, etc.)
- Techniques for sharing the fabrication responsibilities
- Cross-discipline collaboration
The Process
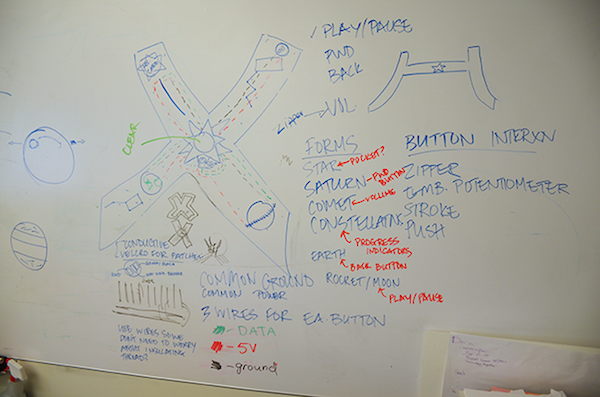
Whiteboard session. We brainstormed, building on each other's ideas. Many of the interaction design elements, visual design elements, and wiring details grew from this session.
Photo courtesy of Andrew Davidson.
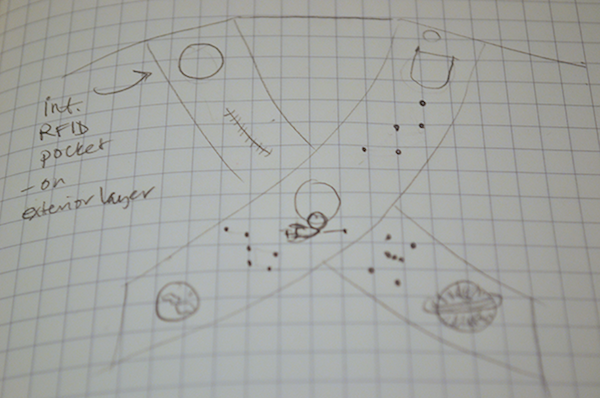
Rough sketch. I began refining the elements from the whiteboard session into a working design.
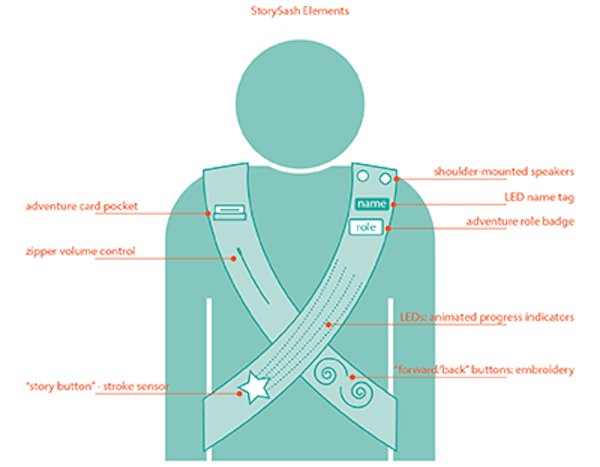
Sash diagram. I converted the team's ideas into a diagram using Adobe InDesign. We had to scale our design a bit, but most of the elements shown were incorporated into the final prototype.
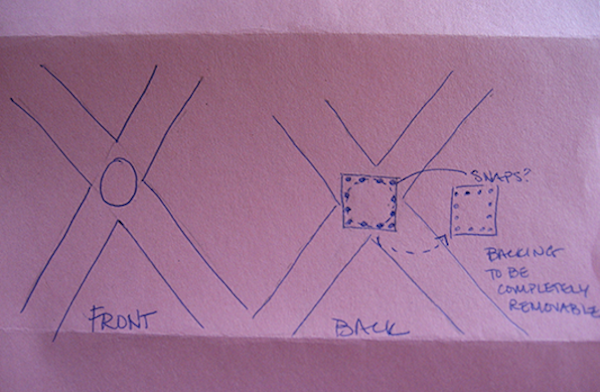
Textile logistics. I began designing ways to include a transparent window to view the Arduino unit. Access to wiring was necessary, and snaps were my first solution for securing the Arduino to the garment.
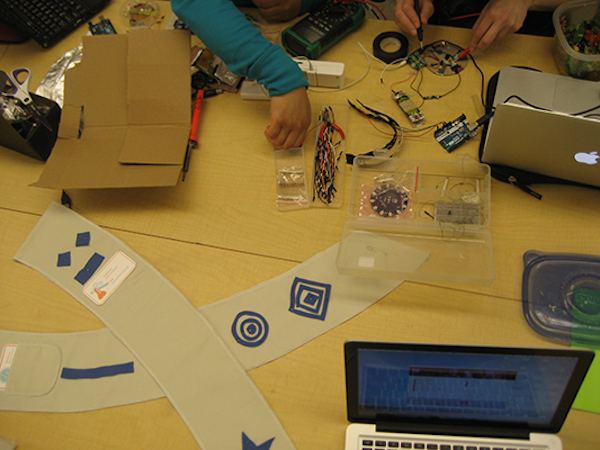
Wiring session. Team Story Sash gathered to experiment with wiring options. I built the low-fidelity prototype with temporary felt buttons. We edited the design after beginning to work with the physical prototype.
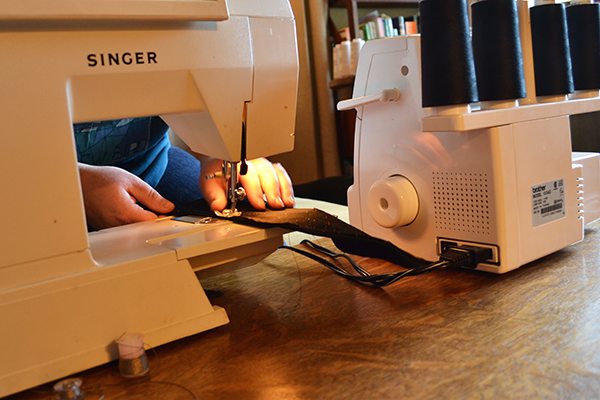
Making the final prototype. I chose a fun sparkle satin fabric to coordinate with our space theme. I constructed the garment using my sewing machine and serger.
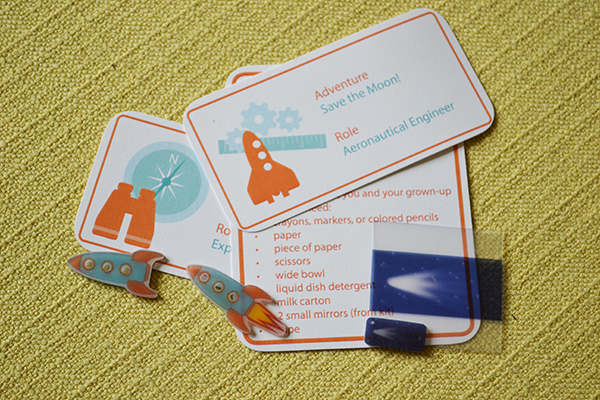
Visual design elements. I designed the adventure cards. I also designed and made the rocket ship and comet out of shrink plastic. The rocket became the play/pause slide button. The comet became the zipper pull, used to control the volume via zipper potentiometer.
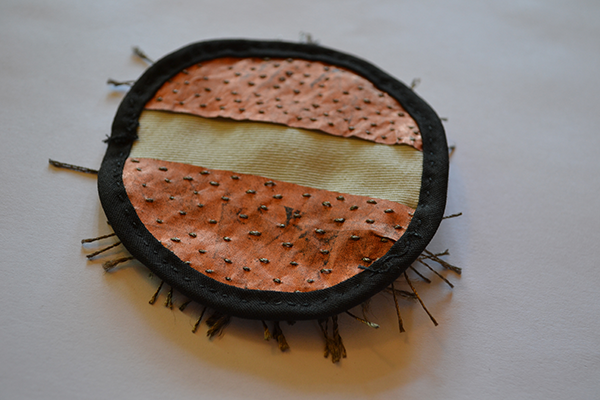
Back of the Saturn "brush" button. I made this button out of cotton twill, conductive copper fabric, and conductive thread. Using a painstaking process of building a carpet-like texture thread-by-thread, I made a button that controlled the forward/reverse commands for our narrative.
When the user brushed her hand over the button, contact was made, completing the circuit. The plastic Saturn rings added to the button kept the threads from making accidental contact. To take the design even further, we added conductive velcro to back of the button. Thus, we made the buttons interchangeable.
When the user brushed her hand over the button, contact was made, completing the circuit. The plastic Saturn rings added to the button kept the threads from making accidental contact. To take the design even further, we added conductive velcro to back of the button. Thus, we made the buttons interchangeable.
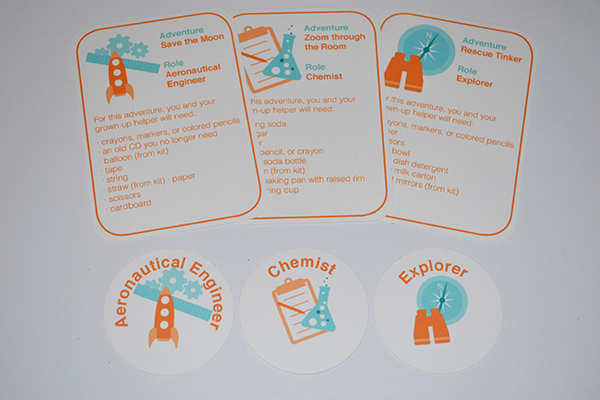
Final adventure cards and badges. I designed all the graphics and made the adventure cards and badges. The adventure cards informed the user what was necessary to complete each adventure. The narrative guided the user through science experiments using household materials.
The badges were a way for the children to internalize their roles in each adventure. An RFID sticker was affixed to the back to the badges. When scanned, the RFID reader commenced the new adventure.
The badges were a way for the children to internalize their roles in each adventure. An RFID sticker was affixed to the back to the badges. When scanned, the RFID reader commenced the new adventure.
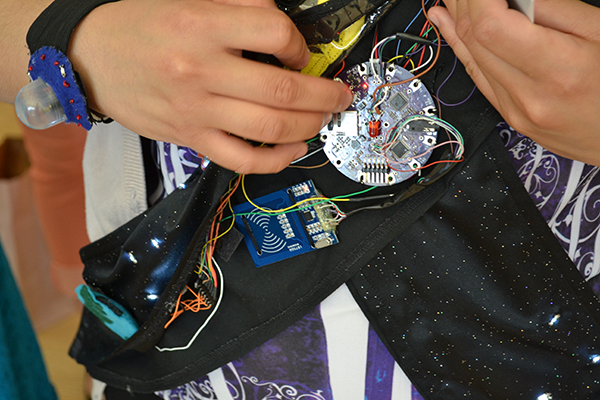
The final high-fidelity prototype. I made the sash with front and back layers. The interior housed the electronics (Arduino Lilypad, RFID reader, and wiring). We hardwired the electronics to the sash using conductive thread, and insulated the connections with hot glue. Our team shared the construction responsibilities.
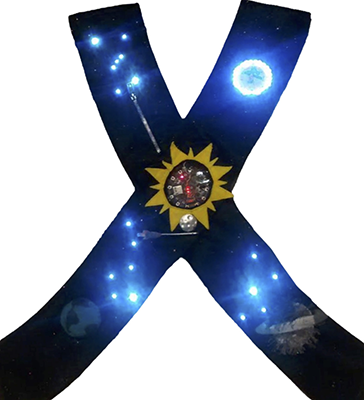
The lighted prototype. Elements include:
- Central Arduino computing unit
- Programmable LED lights (with space for badge display)
- Individual LEDs in the forms of constellations
- Rocket and moon play/pause slide button
- Comet zipper potentiometer volume control
- Saturn interchangeable forward/reverse brush button
- Earth interchangeable forward/reverse soft push button
- Speakers
- Pocket for adventure card
Photo courtesy of Tarhata Guiamelon.
For more information, see: https://blogs.uw.edu/fizzlab/projects/story-sash